E-voting with Qrcode

Tech wordsmith with a passion for code and storytelling. Crafting insightful content to bridge the gap between tech and readers. Embracing the art of words, one article at a time.
 Before I begin I would like to say a Merry Christmas 🎆🎆 and a Happy New Year in advance or in arrears depending on when you see this article 🎅🏾.
So today's article in conjunction with the #ChristmasHackathon is to create an E-voting Webapp. You may be thinking what the 🦆 is an E-voting Webapp?

The system we are going to build follows the QR scan feature that every/most crypto wallet possesses. Imagine you had Crypto(Bitcoin, etherum e.t.c)transferred to you before, you know that all you need to do is show the user your secured QRcode he/she scans, and boom within minutes the transferred amount appears in your CryptoWallet. Using the above concept we created the E-voting Web app, which we would be looking at in a minute. If that illustration wasn't good enough this should shed light on the proposed agenda: Electronic voting (also known as e-voting) is voting that uses electronic means to either aid or take care of casting and counting votes. ... remote e-voting via the Internet (also called i-voting) where the voter submits his or her vote electronically to the election authorities, from any location.
Requirements
So what are the things we would need to get started with this project
- Python
- Basic Html & CSS will be needed
- Django (As its the framework we will be working with )
- And some other Python-Django modules will be provided inside the requirements.txt file
Now we have all that let's begin... To install the requirement.txt file in your terminal type:
pip install -r install requirements.txt
#This will install all modules and packages used in this project
You can use a virtual environment if you don't want all these packages installed on your main machine, If you like to know more about virtual environments I wrote an article about it here. Once the installation process is done you should have all packages for this project.
Creating a project
django-admin startproject <whatevernameyouchoose>
# so in my case I will choose vote
django-admin startproject vote
Creating an app
Once you create a project in Django it is a convention you create an app along with side this, so to do this
#You have to cd into the project directory
cd evote
#Then
django-admin startapp <whatevernameyouchoose>
# Mine will be
django-admin startapp evote
Running your server
To run your web app, you will notice that inside the project directory you created you will find a manage.py file, that would be the file you will run
python manage.py runserver
Once you run this your terminal ... and you get nothing apart from some text and your localhost running on port 8000 something like this
Watching for file changes with StatReloader
Performing system checks...

System check identified no issues (0 silenced).
December 26, 2020 - 08:08:08
Django version 3.1.3, using settings 'vote. settings'
Starting development server at http://127.0.0.1:8000/
Quit the server with CTRL-BREAK.
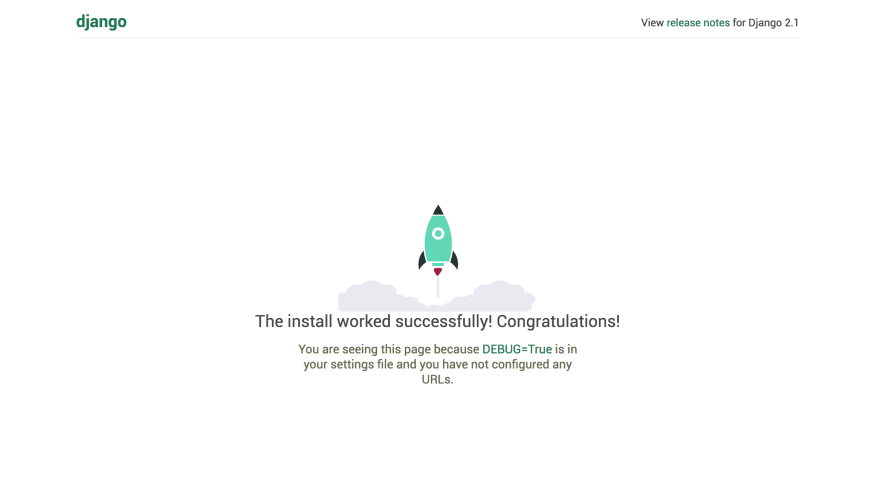
Open your favorite browser and type http://127.0.0.1:8000 you should see the django welcome page
Before the process above a migrations has to be made :
python manage.py migrate
This will run all Django default packages requirements needed for your web app. Once that is done you can run
python manage.py runserver
#And you should be good to go :)
Creating your first view
#In your project settings.py
from django.contrib import admin
from django.urls import path, include

urlpatterns = [
    path('admin/', admin.site.urls),
    path('', include('evote.urls'))
]

#If you look at it well we added the "include" module from the django.urls repo
#And created a path to the URLs of our app
we are setting an empty path, that will lead to the views of our urls.py file for our app ( if that makes sense to you ). but you will notice that you don't have a urls.py file in your app. so you create one inside your app directory.
Inside your urls.py
from django.urls import path
from . import views

urlpatterns = [
    path('', views.index , name = "index"),
]

#So above we are importing some Django modules and one of our own
#Which is from . import * which means from this directory import all views
#The path we are creating is somewhat different because we have to reference the views in this directory
inside your views.py
def index(request):

    context = {}
    return render(request, 'index.html', context)

#You will notice that the views here and the views in urls.py match and that is how it is to be
#We are saying once we type in our web app URL (127.0.0.1:8000) we want to direct them to the index.html page
#But there is one more thing we are missing and that is the index.html we want to show on our page
Creating Templates
Note: Before I go on please note all this is been done inside of your app directory you created. Now that is out of the way let us continue by creating a folder inside of our app directory naming it templates, inside this folder we create our index.html file
Index.html
<!-- Just a basic html template -->
<html>
<head>
  <title>My homepage </title>
</head>
<body>
 <p>This is the body of the home page </p>
</body>
</html>

<!-- Save this and you should be good to go -->
Run your web app again
python manage.py runserver
#If you ran this and you got no error you should see the index.html template you created has the first page
#If you got an error please go back and follow the steps and see where you made the error
To know more about starting up your Django web app you can visit the Django Documentation
We use this process to create any page we need on the site then we tweak the HTML pages to fit my liking. Let's imagine we want to create an about us page
<!-- In your template folder create an about.html file -->
<html>
<head>
<title>About Evoting </title>
</head>
<body>
<h1>Welcome to about section </h1>
</body>
</html>

#In your urls.py create a path to your about page
path('about/', views.about, name ='about-page"),

#Missing a comma can cause an error so make sure you put one whenever you create a path

#In your views.py create the about view
def about(request):

context = {}
 return render(request, 'about.html', context)
And this should be all if you run the server and type this in your browser
127.0.0.1:8000/about

#This will take you to the about section
User Authentication and Registration
Before I go on talking about the registration aspect, let me shed a little more light on the project... We want to create a web app that will create an avenue where people would able to join and create contests/competitions from a click of a button, in doing so user registration is called for yes.
#So we created a new app inside of our project to handle our user registration and authentication
#Thanks to Django some of this process has been simplified

from django.contrib import messages
from django.contrib.auth import authenticate, login
from django.contrib.sites.shortcuts import get_current_site
from django.shortcuts import render, redirect

from .mail import send_confirm_mail
from .models import *
from .forms import CustomAuthForm, UserRegistrationForm, ConfirmationForm

def dashboard(request):
    if request.user.is_authenticated:
        context = {}
        return render(request,'accounts/index.html', context)
    return redirect('contest:home')


def register(request):

    if request.user.is_authenticated:
        return redirect('account:dashboard')

    if request.method == 'POST':
        user_form = UserRegistrationForm(request.POST)


        if user_form.is_valid():

            user = CustomUser.objects.filter(email=user_form.cleaned_data['email'])

            if user:
                context = {'user_form':user_form}
                messages.error(request, 'Email already exists')
                return render(request, 'accounts/register.html', context)

            else:
                new_user = user_form.save(commit=False)
                new_user.set_password(user_form.cleaned_data['password'])
                new_user.is_active = False
                new_user.save()
                '''
                try:
                    send_confirm_mail(user=new_user, email=user_form.cleaned_data['email'])
                    messages.info(request, 'A confirmation code has been sent to your address, please confirm your email address to activate your account')
                except:
                    messages.error(request, 'An error occurred, try re-sending confirmation code')
                '''
                send_confirm_mail(user=new_user, email=user_form.cleaned_data['email'])
                messages.info(request, 'A confirmation code has been sent to your address, please confirm your email address to activate your account')
                return redirect('account:confirm')

        else:
            context = {'user_form':user_form}
            messages.error(request, 'An error occurred during registration.Try again')
            return render(request, 'accounts/register.html', context)
    else:
        user_form = UserRegistrationForm()
        context = {'user_form':user_form}
        return render(request, 'accounts/register.html', context)

def confirm(request):
    if request.method == 'POST':
        form = ConfirmationForm(request.POST)
        if form.is_valid():
            code = form.cleaned_data('confirmation_code')
            try:
                user = CustomUser.objects.get(confirmation_code=code).first()
            except CustomUser.DoesNotExist:
                messages.error(request, 'Confirmation code is invalid')
                context = {'form':form}
                return render(request, 'accounts/confirm.html', context)
            if user.is_confirmed or user.is_active:
                messages.info(request, 'Account already confirmed')
                return redirect('account:confirm')

            user.is_confirmed = True
            user.is_active = True
            user.save()
            messages.success(request, 'Your account has been confirmed. You can log in')
            return redirect('account:login')
        else:
            messages.error(request, 'An error occured during form submission')
            context = {'form':form}
            return render(request, 'accounts/confirm.html', context)


    form = ConfirmationForm()
    context = {'form':form}
    return render(request, 'accounts/confirm.html',context)


def login_user(request):
    if request.user.is_authenticated:
        return redirect('account:dashboard')
    else:
        if request.method == 'POST':
            form = CustomAuthForm(request.POST)
            if form.is_valid():
                cd = form.cleaned_data
                user = authenticate(request, email = cd['email'], password=cd['password'])
                if user is not None:
                    if user.is_active:
                        login(request, user)
                        messages.success(request, 'Logged in successfully')
                        return redirect('account:dashboard')
                else:
                    messages.error(request, 'Account does not exist')
        form = CustomAuthForm()
        context = {'form': form}
        return render(request, 'accounts/login.html', context)
#Note: Updates will be made to the repo in due time
New templates, Forms, Utils, Static folder and files were created to enable different features on the app. If you would like to know more check out the Github repo here. The code snippet above is too handle the user registration
The dashboard section
Each registered user will be given a unique Qr code which they can use to create a contest/competition of their chose
A demo image
 Updated images can be found on the GitHub repo
😂 That is my collaborator on GitHub and a very good friend of mine feel free to follow him on Twitter @jinja and I @NobleTijan (Mine is a new account misplaced my other account 😢)
From the dashboard, a registered user would be able to check how many votes he/she has tallied, view available contests, join a contest & would have a profile section.
Summary
So for the project, we propose an e-voting authentication scheme combined with QR-codes and visual cryptography. We focus on usability, in order to supply voters with less technical experience with a usable scheme. The only requirement is that the user needs to handle a device containing a QR-code reader, most probably a smartphone. This approach is based on visual cryptography as the workhorse. The e-voting code for authentication are encoded as QR-codes and later encrypted into shadow transparencies. Thus, the transparency by itself conveys no information but when the layers are combined, the secret password is revealed. For example, in a traditional Nigerian election, the voter has to authenticate himself at the polling place to be allowed to cast a vote. After the polling places have closed, the votes are counted by the poll workers. This process usually takes a considerable amount of time and therefore electronic voting schemes have started to become more and more popular. Especially in an online voting system, authentication is an important factor. For this, we focus on authentication methods for e-voting which can be combined with QR-codes. To log in on the voting platform, there is no technical background needed, only a QR-code reader i.e. on a smartphone or tablet.
Conclusion
 The main goal was to document and write a full article on this project, unknowingly it was larger than expected. But with what we have above a quick overview of what the project is all about and a brief show on how easy it is to create a web app with Django. If you would like to know more you can check out the GitHub Repo here


